setting → annotation properties → Enable annotation processing → apply,OK

double shift → 파일을 찾을 수 있음
plugins 검색

installed → Lombok 검색
추가가 안 되어있다면 추가하기

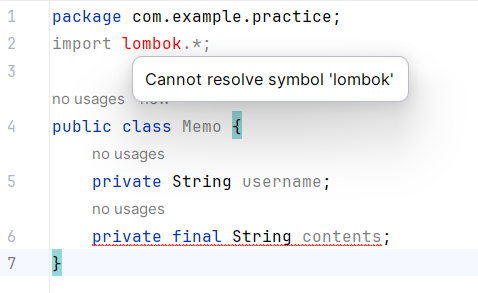
package com.example.practice;
import lombok.*;

public class Memo {
    private String username;
    private final String contents;
}
lombok에 또 빨간줄 뜸

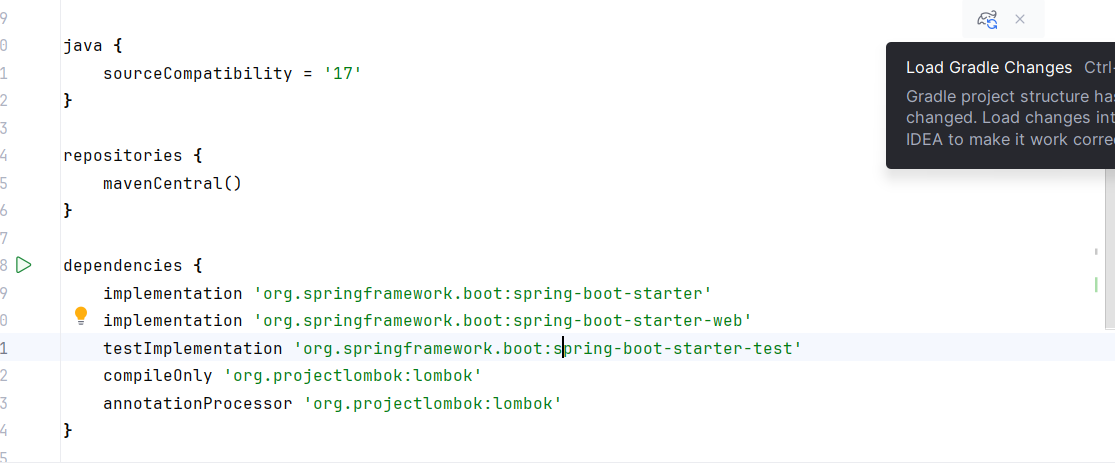
dependencies에 이거 추가해봄
compileOnly 'org.projectlombok:lombok'
annotationProcessor 'org.projectlombok:lombok'
dependencies에 그냥 추가하면 안 되나봄 아까도 그래서 안 된거 같음
오른쪽에 Load Gradle Changes 눌러줬더니 됐음
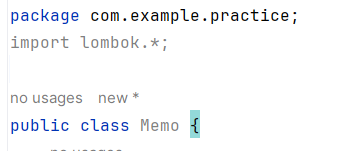
자동으로 된다는 사람들은 저거 자동으로 해주는 설정키가 있어서 그거 켜놨나?


해결됨
@Getter
Memo.java에 Getter를 달아봄
@Getter
public class Memo {
    private String username;
    private String contents;
}
우측 gradle→build→build 한번 빌드해봄

좌측 build→classes→java→main→Memo가봄

Memo.class 에 getter와 setter가 생겨있다
package com.example.practice;

public class Memo {
    private String username;
    private String contents;

    public Memo() {
    }

    public String getUsername() {
        return this.username;
    }

    public String getContents() {
        return this.contents;
    }
}
@Getter로 필드에 대한 get method를 자동으로 만들어준거래
@Setter
Memo.java
@Getter
@Setter
public class Memo {
    private String username;
    private String contents;
}
@Setter도 추가한 후 빌드함
Memo.class
package com.example.practice;

public class Memo {
    private String username;
    private String contents;

    public Memo() {
    }

    public String getUsername() {
        return this.username;
    }

    public String getContents() {
        return this.contents;
    }

    public void setUsername(final String username) {
        this.username = username;
    }

    public void setContents(final String contents) {
        this.contents = contents;
    }
}
setter도 생겨있다
@AllArgsConstructor
@AllArgsConstructor
public class Memo {
    private String username;
    private String contents;
}
= All arguments constructor
public Memo(final String username, final String contents) {
        this.username = username;
        this.contents = contents;
    }
모든 필드 초기화하는 생성자 만들어줌
@NoArgsConstructor
파라미터 없는 생성자 만들어줌
package com.example.practice;
import lombok.*;

@NoArgsConstructor
public class Memo {
    private String username;
    private String contents;
}
자동으로 이렇게 됨
public class Memo {
    private String username;
    private String contents;

    public Memo() {
    }
}
@RequiredArgsConstructor
package com.example.practice;
import lombok.*;

@RequiredArgsConstructor
public class Memo {
    private String username;
    private String contents;
}
//
// Source code recreated from a .class file by IntelliJ IDEA
// (powered by FernFlower decompiler)
//

package com.example.practice;

public class Memo {
    private String username;
    private String contents;

    public Memo() {
    }
}
scr→main→resources→application.properties
스프링과 관련된 설정을 할 때 사용하는 파일
스프링부트는 자동으로 설정됨
이 파일을 사용하면 자동으로 설정되고있던 것들을 수정할 수 있음
데이터베이스에 정보 전달할때도 쉽게 설정 가능하다 함
아파치 톰캣 기본 포트 설정은 8080
한번 바꿔보겠음
application.properties
server.port=8081
~~Application 실행시키니까 포트가 8081로 나옴
.   ____          _            __ _ _
 /\\\\ / ___'_ __ _ _(_)_ __  __ _ \\ \\ \\ \\
( ( )\\___ | '_ | '_| | '_ \\/ _` | \\ \\ \\ \\
 \\\\/  ___)| |_)| | | | | || (_| |  ) ) ) )
  '  |____| .__|_| |_|_| |_\\__, | / / / /
 =========|_|==============|___/=/_/_/_/
 :: Spring Boot ::                (v3.1.5)

2023-11-02T16:26:35.574+09:00  INFO 5384 --- [           main] c.example.practice.PracticeApplication   : Starting PracticeApplication using Java 17.0.9 with PID 5384 (E:\\Workspace\\IntelliJ\\practice\\build\\classes\\java\\main started by USER in E:\\Workspace\\IntelliJ\\practice)
2023-11-02T16:26:35.580+09:00  INFO 5384 --- [           main] c.example.practice.PracticeApplication   : No active profile set, falling back to 1 default profile: "default"
2023-11-02T16:26:36.296+09:00  INFO 5384 --- [           main] o.s.b.w.embedded.tomcat.TomcatWebServer  : Tomcat initialized with port(s): 8081 (http)
2023-11-02T16:26:36.322+09:00  INFO 5384 --- [           main] o.apache.catalina.core.StandardService   : Starting service [Tomcat]
2023-11-02T16:26:36.322+09:00  INFO 5384 --- [           main] o.apache.catalina.core.StandardEngine    : Starting Servlet engine: [Apache Tomcat/10.1.15]
2023-11-02T16:26:36.433+09:00  INFO 5384 --- [           main] o.a.c.c.C.[Tomcat].[localhost].[/]       : Initializing Spring embedded WebApplicationContext
2023-11-02T16:26:36.434+09:00  INFO 5384 --- [           main] w.s.c.ServletWebServerApplicationContext : Root WebApplicationContext: initialization completed in 813 ms
2023-11-02T16:26:36.696+09:00  INFO 5384 --- [           main] o.s.b.w.embedded.tomcat.TomcatWebServer  : Tomcat started on port(s): 8081 (http) with context path ''
2023-11-02T16:26:36.703+09:00  INFO 5384 --- [           main] c.example.practice.PracticeApplication   : Started PracticeApplication in 1.435 seconds (process running for 1.942)
2023-11-02T16:26:36.296+09:00 INFO 5384 --- [ main] o.s.b.w.embedded.tomcat.TomcatWebServer : Tomcat initialized with port(s): 8081 (http)
'TIL(Develop)' 카테고리의 다른 글
| Controller이해하기 (0) | 2023.11.02 |
|---|---|
| Spring MVC (0) | 2023.11.02 |
| 테스트코드 (0) | 2023.11.02 |
| 웹/Spring 기초 개념 공부 (1) | 2023.11.01 |
| 첫 실습! HelloWorld GET해오기 with SpringBoot + Postman (1) | 2023.11.01 |


